Feeds:
Posts
Comments

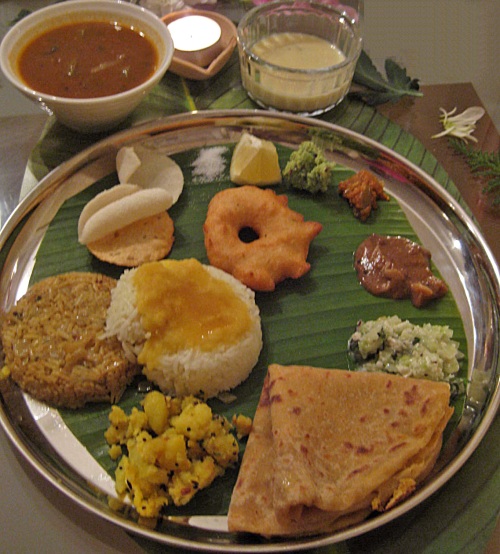
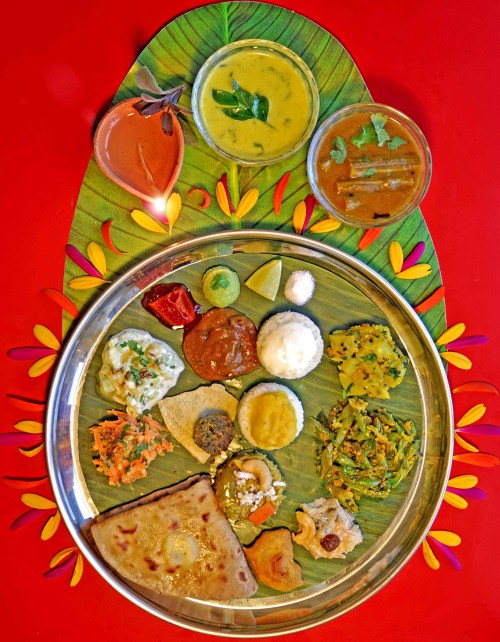
Puranpoli ThaliPerfection is a myth according to many and many more like me believe that it’s a dream, something that you can’t really touch but there’s an image set in your mind that you strive to achieve. I have an image set in my mind about what a perfect Maharashtrian Thali on festive occasions should be like. Perfect little piles of different dry vegetables, Raitas, salads, rice varieties, pickles, chutneys and the centre of it all, the sweet lentil stuffed bread, Puranpoli! When I was younger, the all important Puranpoli was the main item of interest and everything else seemed like a distraction. I used to even complain to my mother for her obsession of cooking too many side dishes in order to make it look all perfect. Now when I do the exact same thing and fuss over fifteen different elements on the plate, I smile to myself! Yes, no matter how much I deny it, slowly but surely, I’m turning into my mother. I’m also keeping the tradition alive that came from my mother, my grandmother and all those previous generations of women in my family who were obsessed with this idea of how things should be.

This time around for Holi celebrations, I decided not to fight off my instinct and instead decided to embrace my obsession. Fortunately I had time and energy to tackle so many different recipes and the all important order of how to plate them perfectly.

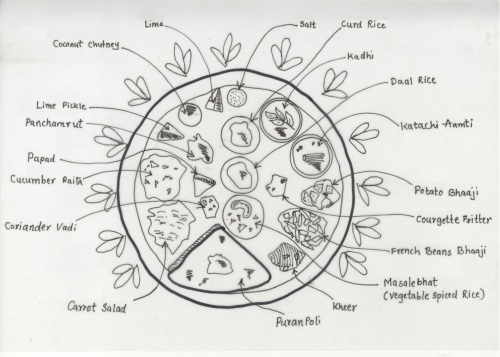
Puranpoli Thali Sketch

This is a rough sketch of the plate that I had prepared before plating the food so that I don’t miss the order & I don’t forget to plate something. This is the manner in which Maharashtrians would prepare the plate but I’m told that in Karnataka, the order is exactly reverse, instead of anticlockwise direction of lime, chutney, pickle, salads etc. they go clockwise.

Cooking took six long hours in total but it was at a nice leisurely pace and I thoroughly enjoyed the process. I was even conversing (in my mind) with my mom & other women in my family while cooking. I can hear them when I cook, “This is not how we do this”, “This needs to be little more runny”, “Don’t put asafetida in that”, “Don’t put too much on the plate”…Constant reminders, corrections, advise & encouragement, all at the same time. After I plated everything and looked at the picture with satisfaction, I so strongly felt that they should have been here to taste it and to enjoy the feast. I remember being someone’s daughter, someone’s granddaughter, someone’s niece, someone’s daughter-in-law and someone’s grand-daughter-in-law. I remember being pampered by all those women, I remember tasting their fantastic food, I remember picking up all these skills from them and most of all I remember them enjoying the process. At times like these, I realise, how at the very core I’m so much like all of them, even though my modern life is so different from theirs, how I’m still a simple woman trying to preserve my culinary heritage!

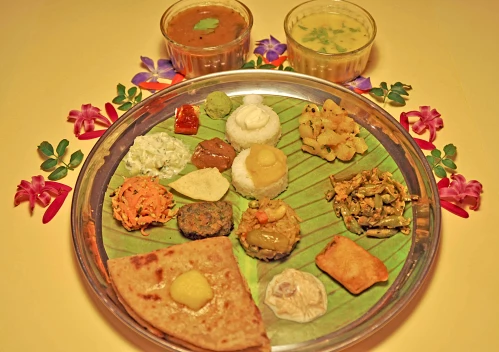
puranpoli Thali

A little description of the dishes:

Puranpoli: This is a bread stuffed with sweet filling made with yellow lentils (chana dal). An absolute delicacy of Maharashtra & it is a must for quite a few festive meals.

Coconut chutney: Fresh coconut, chilies, coriander, raw mango (for sourness or one use lime juice), salt & sugar ground together.

Pickle: I used homemade lime pickle, a special recipe called ‘Upvasache lonche’ which has only four ingredients limes, salt, sugar and chili powder all mixed together & kept in sterilized jars until the lime are soft & have absorbed all the flavours. It took about two months for my pickle to be completely ready and although it can last for a long time, mine will be consumed very quickly as its really delicious.

Cucumber Raita (Koshimbir): It’s finely chopped cucumber & coriander leaves mixed with some plain yogurt, salt, sugar & a little peanut powder. Use of peanut powder is very typical to Maharashtrian recipes and it gives the salads a nice nutty flavour. A tempering of cumin seeds, chopped green chilies and curry leaves fried in little ghee was poured on top of the raita to give it more flavour.

Carrot Salad (Koshimbir): Same as cucumber raita except there is no yogurt in this salad instead a little lime juice is added for sourness.

Potato Bhaji: Boiled and cubed potatoes are sautéed in spicy tempering using curry leaves, chilies & urad dal. Fresh grated coconut and coriander leaves are sprinkled on top.

French Beans Bhaji: Sliced French beans are sautéed in tempering and then covered and steamed in its on juices until tender but not overcooked. Peanut powder, salt, sugar, lime juice, grated coconut and coriander leaves are added for flavour.

Courgette Fritter: This is similar to a Pakora made with gram flour batter. A local vegetable called Ghosale is used for this bhaji. Ghosale is very similar to courgette (Zucchini) & I used courgette myself. Any other vegetables like potato or cauliflower etc. can be used for a fritter.

Kothimbir Vadi: This spicy coriander cutlet is a typical Maharashtrian dish. Yellow lentils (chana dal) are soaked until soft, drained completely and them ground with chilies, ginger, salt, sugar and lime juice. A bunch of coriander is finely chopped and mixed with the ground paste and a the mixture is formed into a rolled, steamed, when cold cut into thick circles and then shallow fried in some oil. Gram flour is sometimes used instead of soaked chana dal to make the paste.

Kadhi: This is a spiced yogurt soup (very broad and crude description indeed!) that is made in many different ways, all overIndia. My version used curry leaves, ginger, green chilies, asafetida, cinnamon and cloves for flavouring.

Katachi Aamti : When the yellow dal is being cooked for  the Puranpoli, the excess water in which the dal is cooked is collected and used to make ‘Aamti’ which is a clever use of a protein-rich byproduct & is absolutely delicious. I also added some drumsticks in mine.

Kheer: This sweet is also called ‘Payasam’ inSouth India. This is similar to rice pudding but can be made with thin wheat noodles called Seveyein instead of rice. I made Seveyein kheer with cashew nuts and raisin.

Masalebhat: This is essentially a variation of Vegetable Pulao prepared using Maharashtrian spice mix powder called ‘Goda Masala’. A range of vegetables can be used but I used Tendli / Tindora, carrots & green peas.

Panchamrut: This is a tangy tamarind chutney which uses dried coconut flakes, sesame seed powder, peanut powder, chilies and jaggery (or sugar) Yummy!!

Typically a festive meal like this is offered to the Gods and due to religious reasons, use of pungent garlic & onion is forbidden. While for me there’s no such restriction, I still try to avoid the two ingredients that ‘I Love’ just to learn that an equally delicious and flavourful meal can be prepared without them.

Sweet, sour, hot, crispy, soft, tangy, cool, warm…oh.. the vocabulary in English language is really limited to describe all the tastes and textures presented on a single plate of vegetarian meal like this. A rich, grand traditional meal of my land!
Amaretti Biscuits

Amaretti BiscuitsEvery year during Christmas season, I prepare homemade edible hampers for friends and every year, I try to bake different biscuits to include in the package. This year I had a special challenge while preparing this for a friend who went on a ‘gluten and sugar free’ diet. I started searching for recipes but sometimes these healthy snacks are something of an acquired taste because of the alternative ingredients used in them. But eventually, I found a recipe that is utterly delicious, extremely easy to prepare and still very healthy. 

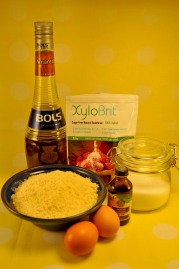
I’ve had a book of Italian recipes for 12 years and always wanted to try the recipe for Amaretti Biscuits in it but never got around to actually doing it. The recipe calls for mere 4 ingredients Eggs, almonds, sugar & vanilla extract. So this is ‘gluten free’ but not exactly ‘sugar free’! A trip to a local health shop solved the other problem when I found ‘Xylitol’ a natural sugar substitute. Diabetes is in my family for last two generations so these days I’m keen on educating myself about the possible sugar substitutes. From what I know so far, Xylitol is completely natural and doesn’t seem to have any adverse side effects if consumed in small portions.

The biscuits were such a huge success, that I’m totally addicted to baking them now. When I bake them I use sugar but it’s nice to know that I can bake them using Xylitol for my diabetic mother.

Ingredients:

  • Ground almonds 200 gms.
  • Caster sugar OR sugar substitute 225 gms
  • 2 egg whites
  • 1 tsp vanilla extract
  • 2 tsps Amaretto liquor (optional)
  • Butter for greasing
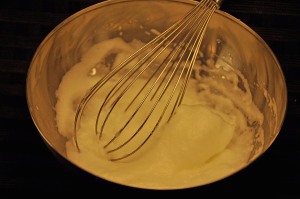
  1. Preheat oven at160 C. Place a baking sheet on a baking tray and grease it lightly with some butter. Mix half of the sugar in the ground almonds and reserve. Beat egg whites till they form soft peaks.
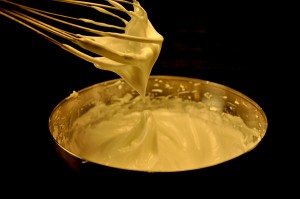
  2. Now slowly add the remaining sugar, a little at a time in the mixture and continue beating until all the sugar is incorporated and the mixture forms stiff peaks.
  3. Now fold in the almond mixture into the egg mixture until well incorporated. Mix in vanilla extract and Amaretto liquor if using. Fill the mixture into a piping bag and pipe-in small dollar size shapes on the baking sheet. Keep them spread apart as the cookies will expand while baking.
  4. Bake for 15-18 mins or until they are pink in colour. After taking them out of the oven, let the cookies cool for 2-3 mins on the tray. Then place them on a cooling rack till they cool down completely. When the biscuits are completely cold, place them in an airtight container before storing. 

Lamb BiryaniThe Nawabi Khana is a serious business. This is royal cooking; elaborate, complex and refined. There are no shortcuts here; it takes time and patience to cook this…. but boy is it worth it! If you have ever dug into the layers of perfectly cooked meat, rice and tons aromatic spices in an authentic ‘Hyderabadi Biryani’ you’ll know what I mean. Cooking rice with meat is always a tricky business. Rice cooks quickly and the meat takes a long time to cook. Naturally, to make a perfect Biryani where both meat and rice are cooked to perfection is a cook’s ultimate challenge. Goli Biryani is a slightly easy version where meatballs in gravy are used instead of raw marinated meat. Goli means a small round shape as in a meat ball here.

Last week when I had some marinated lamb mince sitting in my fridge, I hadn’t planned to cook anything elaborate with it. I was really busy that day but the mince needed to be used up quickly so I just made a few meatballs, shallow-fried them in some oil and when they cooled just stuck them back into the frige to use later. The next day I made Goli Biryani with them which was a huge success in the household so I decided to cook it again today for an ‘Indian Night’  at an office charity get together.

There are three stages:

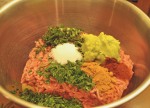
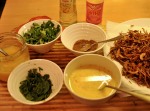
  1. Preparation stage where you make ginger-garlic paste, onion paste, marinate the meat, prepare spice powders (if not using shop bought), wash & soak the rice, soak the saffron in milk etc. Preparing crispy fried onion, chopping herbs is also done at this stage.
  2. Actual cooking stage where you shape and sear the meatballs, prepare a gravy and dip the meatballs in them and pre-cook rice till half done.
  3. Assembly stage where you create multiple layers of rice and meat with herbs and spices. The biryani is sealed and cooked further on Dum (on steam) till done at this stage.

Since there are large number of ingredients and processess, I’ve broken them down as per the stages:

Ingredients for Ginger-Garlic paste

  • Garlic 25 gm (about 1 large bulb)
  • Ginger 25 gm (3-4 inch piece)
  • 2 chillies

Grind together all  the ingredients above to make a smooth paste.

Ingredients to marinate the mince:

Lamb Mince 500 gm

  • Ginger-Garlic-Chili paste 2 tsp
  • 1/2 tsp turmeric powder
  • 1/2 tsp cayene pepper
  • 1 egg
  • 2 tbsp chopped coriander
  • 1 tbsp chopped mint
  • Salt t0 taste

Mix all the ingredients above together, cover with a cling film & refrigerate.Fried Onions

Crispy fried Onion

  • 2 large onions

Thinly slice 1 large onion and deep fry it till brown & crisp. Please be mindful that it takes a little while for the onions to become pinkinsh brown but from that point onwards, the onions can become dark brown in seconds. You’ll need to watch them carefully & take them out at the right time, to avoid burning them.

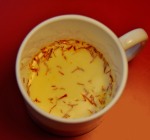
Saffron Milksaffron

  • Saffron 1 pinch
  • Milk 1/2 cup

Take warm milt &  soak the saffron in it.

For Rice

  • 2 cups (225 gm) Basmati Rice
  • 2 bay leaves
  • 4 green cardamoms
  • 2 inch piece if cinnamon
  • 3 cloves

Wash and soak the rice for 30 mins then drain. In a large pot cook the rice with the spices above in 4 cups of water till it’s half done. Drain, discard the spices & reserve the rice for later.

Make marble sized balls of the marinated lamb mince & sear them in a frying pan in a little oil. Drain the meatballs on a kitchen towel. Lamb mince will release some fat in the pan, reserve this fat for the gravy.

For Gravy

  • 4 tbsp oil / fat released from the meatballsMeatballs
  • 1 large onion (Minced)
  • 2 large tomatoes chopped
  • 2 tsp ginger-garlic paste
  • 1/2 tsp turmeric powder
  • 1 tsp chilli powder
  • 2 tsp coriander powder
  • 1 tsp cumin powder
  • 2 tsp garam masala OR Biryani masala powder
  • 1/2 cup yogurt (whisked till smooth)

Heat the oil in a pan & add minced onion and ginger-garlic paste to it and keep stiring on a medium-low heat. After a few mins add turmeric powder, chilli powder, coriander powder & cumin powder. Fry a little, taking care not to burn the spices. Now add the tomatoes and cook while stirring until the tomatoes are cooked and the mixture starts releasing some oil. Now add 1/2 cup of water &  yogurt to the gravy and stir. Add the meatballs in the gravy and mix them together. Cover the pot and let it simmer on a very low heat for 5-7 mins. Take the pot off the heat.

Ingredients for assembly

  • One tomato sliced in circles
  • Ghee (clarified butter) 2-3 tbsp
  • Rice prepared in advance
  • Meatballs in gravy prepared in advance
  • Fried onions prepared in advance
  • Saffron soaked in milk prepared in advance
  • Chopped coriander leaves 1/2 cup
  • Chopped mint leaves 1/2 cup
  • Garam Masala /Biryani Masala 2 tsp
  • Rosewater 2-3 tsp
  • Kewra essense (optional) 2-3 tsp

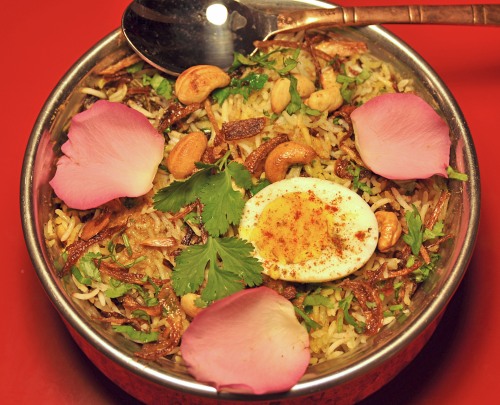
In a large casserole heat some ghee, place the tomato circles at the bottom. Add first layer of meat followed by a layer of rice. Sprinkle some chopped herbs, fried onions, 1 tsp ghee, a few drops of rosewater & a few drops of kewra essense. Sprinkle some Biryani masala and drizzle a little saffron milk on top. Repeat the layer of meat & rice in the same fashion & finish with a layer of rice on top. On top add all the herbs, extracts and spices as before. Cover the casserole, seal the edges with a dough made from flour. Keep a griddle on a very low heat & keep the casserole on top of it. Let the Biryani cook on steam trapped inside the casserol for 10-15 mins. Granish with rose petals and boiled egg if you like and serve it with some raita or plain yogurt.

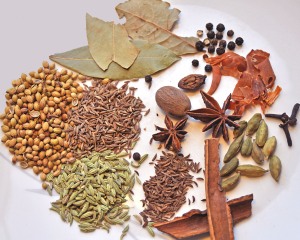
Biryani Masala

Biryani Masala is essentially a variation of Garam Masala.  The difference between the two is in the proportion of spices. The recipe for Garam Masala itself changes from one household to another and it is really hard to come up with a standard recipe for any of the dry masala powders used across India. As per the recipes that I follow, I can say that generally Biryani Masala has more of ‘sweet’ spices than ‘hot’ spices. What I consider sweet spices are green cardamom, nutmeg, mace, star anise & cinnamon. These spices do not have much heat in them but they are extremely fragrant and that’s why they are used in desserts as well. What I consider ‘hot’ spices are cloves, black pepper & black cardamom. Some recipes do not call for cumin & coriander in Biryani Masala but others do. Here’s the recipe I follow:

  • 10 green cardamoms
  • 1 small nutmeg
  • 2-3 blades of mace
  • 2 star anise
  •  3″ piece cinnamon
  •  1 black cardamom
  • 3 cloves
  • 2-3 dry bay leaves
  • 1 tsp caraway seeds
  • 1 tsp fennel seeds
  • 1 tsp cumin seeds
  • 2 tsp coriander seeds
  • 10-15 peppercorns

Dry roast all the spices separately on a low heat until they are fragrant. After they cool down, grind them to a fine powder using a spice grinder. Store in airtight container. If you do not have a spice grinder, a coffee grinder works just as well.

Valeria’s Cookies

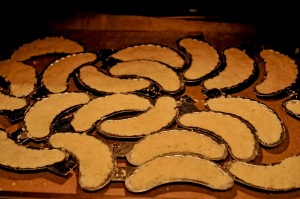
Crescent CookiesSome time ago, at a dinner party, a friend of ours brought these beautiful, dainty, crescent shaped traditional Slovakian cookies which caught my eye. The taste and texture was even better; nutty, crispy and sweet. When I asked Valeria about them, she graciously gave me the recipe for these walnut cookies that are called ‘Orechove Rohlicky’. I obviously didn’t have the moulds that give these cookies the neat crescent shape so I kept thinking about what else I can use to shape them but somehow never got around to actually baking them. In the meantime, our friend went to Slovakia for her holidays & when she retuned, she had a wonderful gift for me…those beautiful crescent shaped moulds! Whenever someone gives a gift that is so appropriate, the joy of giving and receiving these gifts is really five fold!Crescent Moulds

As soon as I got these moulds, I was eager to use them. The recipe called for ground walnuts (I’m told that ‘Orechove’ means Walnuts in Slovak) but since I had ground Almonds at home, I decided to use them instead of walnuts. The result was quite successful and now I make them with either walnuts or almonds.

Ingredients:

Ground Walnuts / Almonds -120 gm

Cold Butter cut into cubes – 120 gm

Icing sugar – 250 gm

Flour – 100 gm

Baking Powder – ½ tsp

Vanilla Extract – 1 tsp

Chocolate – 100 gm

250gm sugar makes these cookies a little too sweet so you can reduce the sugar a little if you like. However the sugar in these cookies also helps them bind together so reducing it too much might result in very brittle cookies.

The recipe couldn’t be simpler.

  1. Just like with a short crust pastry, mix together ground almonds, butter, sugar, vanilla extract and flour until the mixture resembles coarse breadcrumbs. My friend told me to make sure not to over-work the mixture and to keep the butter as cold as possible while mixing. Since my hands are always warm, the butter melts quite quickly so I decided to use the food processor. This made my job even easier, just put all the ingredients in the food processor, mixed them until they looked like breadcrumbs.Crescent cookies
  2. Pack the mixture loosely into the moulds and bake at 180 degree Celsius for about 8-10 mins or until lightly browned. Voila…the cookies are ready! If you break the cookie after they cool down, you’ll see that they are hollow from inside which makes them quite light.
  3. To cover them in chocolate, melt some chocolate in a bain-marie and then dip half part of the cookie in chocolate and then place the cookie on a grease proof sheet, on a tray. Keep the tray in a cool place until the chocolate sets.

The recipe is so simple that these are ideal to bake with children. The last time when we prepared them, I let my five year old do most of the work and that made them even more special!

Orechove Rohlicky may be the traditional name for these crescent cookies but we simply call them Valeria’s cookies, which brought a little bit of Slovakian cuisine into our Indian household.


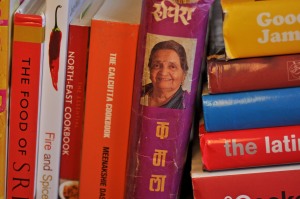
Kamalabai OgleWhenever I’m planning on cooking some traditional Maharashtrian recipe, I just go over to the bookshelf & pick up ‘Ruchira’ automatically. My copy of the book is as old as my marriage, almost 13 years! Over the years, this heavily used book has picked up stains of turmeric, chilli powder, oil; even some pages are coming off loose and still every time I’m browsing it, I find something new in it. Like many of the Maharashtrian brides, I was gifted this cookbook at my wedding but my relationship with this book is even older. Growing up, I always noticed my mother referring to ‘Ruchira’ and this book was part of our kitchen since. My mother is an accomplished cook and my maternal grandmother was even a step further. (My grandmother passed away over twenty-five years ago and still, even today there are people who talk about her cooking and her desire to achieve perfection in everything she did.) So a book that has been endorsed by both my grandmother and my mother; has to be something special! Ruchira is not just a cookbook to me; it’s an extract of a traditional Maharashtrian cuisine that has been handed over from mothers to daughters over the last few generations. My statement above might seem like an overstatement if you consider that this cuisine that I’m referring to is ‘traditional, Maharashtrian, Brahmnical and vegetarian’! However like everything in India…even this small segment of a cuisine is seriously vast and for a single person to try and capture this in entirety in one book and sell it at a price which was affordable for everybody is really commendable. Just to put it in perspective, the printed price on my book is 90 Rupees which is less than 2 Euros. Granted that the value of 90 rupees in India thirteen years ago was lot more than 2 Euros in Europe today but it was still a very affordable price for most sections of the society in India then.Ruchira

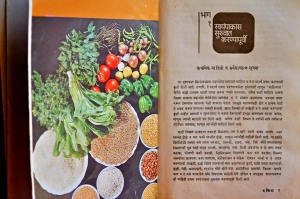
This book is not the glamourous cookbook which has millions of wonderfully styled food photographs or the one that gives you precise instructions with exact cooking times etc. but it covers a wide range of recipes from simple everyday meals to special festive meals for a large number of people and even pickles and preserves. If this puts you off; let me assure you that this exactly is the charm of the book. What it offers you is a traditional recipe in a way a mother would tell her daughter, it lets you explore it a little, it gives you a little room to work within the recipe, it shows you that the person narrating this recipe has some confidence in your abilities as a cook. Few things are taken for granted in this book though, it is assumed that the user of this book is Maharashtrian, Indian and is familiar with general cooking methods and ingredients in this part of the world. Even though an English version of this book is available it doesn’t have all the recipes from the original book. At the moment the English version of the book seems to be out of stock at popular sites like Amazon & Book Depository (U.K.) but it seems to be available for online order here.

The author of this wonderful book Kamalabai Ogle was sixty years old when this book was first published. In a very touching prologue of the book Kamalabai tells the story of how little she knew about cooking when she got married and how she quickly learned under the guidance of her mother in law, who was an accomplished cook. In a very humble and simple manner she tells her story of how she came about writing this book. Whenever I read this part of the book, I feel a strong connection with her & my heart fills with this overwhelming emotion of gratitude towards her & towards the generation of my mothers, grandmothers, great grandmothers & all the previous generations who continued this wonderful tradition of handing down traditional knowledge from mothers to daughters. This book has ensured that this tradition will continue for a few more generations.

This book challenges me personally as well, to even try and cook all the recipes given in the book will take me years. At the beginning of this year as a resolution I’ve decided to cook at least one recipe from the book everyday and photograph it. Persistence, determination and consistency are usually not the virtues that are associated with my name but lets see if my passion for this book overcomes my vices! Kamalabai Ogle has given us this book as a tribute to her own mother in law & this will be my personal tribute to Kamalabai for this wonderful book.

Maharashtrian Thali

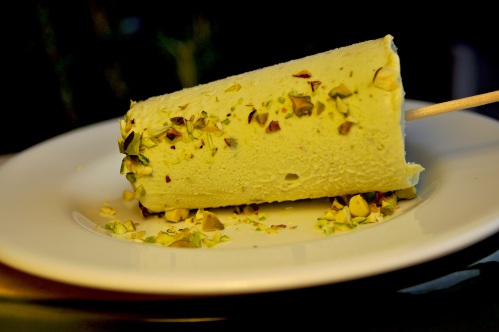
Pistachio Kulfi

Pistachio Kulfi I have a confess that when I was living in India, I was never a big fan of Kulfi. It might have been because; as a child I disliked the taste of milk. I even hated Basundi, which is basically sweetened and thickened, reduced milk. Since the base of the Kulfi is reduced milk, I was never really fond of it. Over the years as my tastes evolved, I got over my dislike for milk and I gave Kulfi another shot and this time I loved it. Since I didn’t have access to the authentic Mewad Kulfi, I started my research to find an authentic recipe.

I soon realised that a lot of the recipes are using evaporated milk and condensed milk instead of reducing the milk by boiling it down. I wasn’t completely happy with the end product using any of these recipes. This time around I wanted to make a pistachio Kulfi and my search widened.  I wanted full flavour of real pistachios instead of just adding some chopped nuts. Didn’t find any recipe that I liked so I decided to take the best bits of Kulfi & Pistachio Gelato recipes and to combine them. I came up with something, that had the full flavour and colour of real pistachios and had the texture of a Kulfi. I just went with my instinct and noted down the quantities later. Kulfi is not traditionally churned but I did use my ice-cream machine to churn it before freezing it in moulds. So call it  pistachio gelato, pistachio ice-cream or call it pistachio Kulfi; either way the recipe below will give you an absolutely delicious, thick, creamy frozen dessert with full flavour of pistachios and a hint of honey.

Full fat milk 1 litre

Double cream 250 ml

75 gm pistachios

2 tbsp sugar (More if you prefer)

2 tbsp honey

¼ tsp cardamom powder

1 tsp corn flour

1) Soak 50 grams of pistachios in some hot water.Chop the rest of the pistachios & reserve them for later.

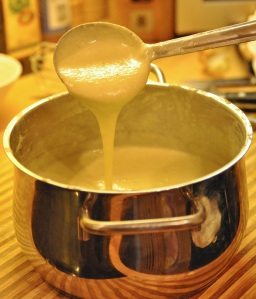
2) In a large, heavy bottomed pot, start heating the milk on a medium-low heat, stirring continuously. Stirring is absolutely critical as its very easy to scorch the milk at the bottom. When the volume of milk is reduced to half its original quantity, add the double cream to it. Let the mixture simmer for 5 more minutes and then take it of the heat. The whole process can take up to 40-50 mins. I know….it’s too long! But let me assure you that it will all be worth it in the end!  You can do this on the side while you are cooking your dinner. Keeping one eye on the milk to not let it boil over & a gentle stir every few minutes to ensure that it doesn’t scorch, is whats required.

3) Cool down ¼ cup of the reduced milk. When it is completely cold, add the corn flour to it and mix until well incorporated.

4) Peel the skins of the soaked pistachios and put them in a blender with the honey and a half cup of reduced milk and blend them until smooth.

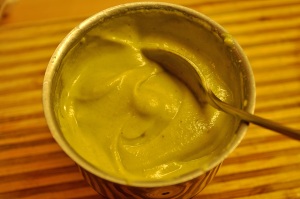
5) Put the reduced milk back on a medium-low heat and add sugar to it. Then slowly add the ground pistachios and the corn flour mixture to it and kept stirring it with a hand whisk. When the milk is thickened to the consistency of a slightly runny custard, take it off the heat. Stir in the chopped nuts and the cardamom powder and let the custard cool down.

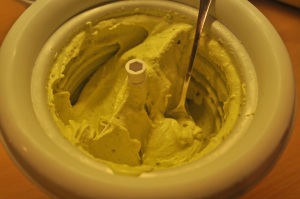
6) When cold, put the cold custard into the ice cream machine and churn it until thickened and then spoon it into the ice-lolly moulds and place them in the freezer. If you don’t have an ice cream machine you can skip this step & just spoon the custard in the ice lolly moulds and freeze.

7) When the Kulfi is completely set, gently dip the moulds in warm water for a few seconds & then slowly pull out the kulfi and serve with chopped pistachios as a garnish.

Everything with a pinch of salt and a pinch of spice,
especially those raw green mangoes stolen from the neighbour’s backyard or those tarty fresh gooseberries nicked from another neighbour’s garden.
Such thieves we were… wouldn’t even wait until the fruit was ripe.
We were climbing trees, jumping over fences, running away from clamouring owners. With scratched elbows, blood on knees, teeth all sour with a sharp kick from the sour fruit! Mouth sore from sucking on fibrous sugarcane till the last drop of sugary sweetness and tongues all blue and numb from abundant jamoons fresh off the trees.
We ate everything with a pinch of salt and a pinch of chili powder that we packed in small parcels when no one was looking.
That was my first mango pickle, prepared right there, on the rooftop, in a dusty plastic container. Salt, chili and stolen fruit! Somehow stolen fruit always tastes better!
We ate everything; sucked the nectar from every known flower, plucked petals off marigolds for the small white coconutty base.

We ate seeds, we ate leaves and we ate anything that looked colorful (It was a miracle we didn’t poison ourselves!). We were the adventurers of the culinary world; we were scientist busy trying strange combinations!

We watched our mothers in the kitchen; we dipped fingers, we licked fingers, we trained our pallete, we strengthened our gut.

We guarded pappadums drying in the sun, we watched our mothers mixing spices like magic potions. Like sponges we absorbed everything…we absorbed the spices of our culinary heritage.

Here I am now, with all those memories lingering in my head.

Here I am now, surrounded by millions of cookbooks.

Here I am now, in a foreign land, looking at new ingredients.

Here I am now, addicted to cookery television.

Here I am now, in my kitchen with my child as my sous chef.

Here I am now, with bag full of spices and a belly full of appetite!